This Article Applies From:
CVI Fusion 8.5 | Infinity Client 8.5 | Infinity Module 8.5 | Core Services 8.5 |
Introduction
Pivotware allows you to organise steps within a process in a logical manner using Group of Steps. The present article will help you understand and get started with the feature.
1 - Suggested readings before diving in
You would benefit, before reading through this article, to be familiar with CVIFusion interface and how to create Stations, Steps and Processes. If you are new to Pivotware, you can read through the following articles:
- CVIFusion user interface : this article describes CVIFusion user interface and how to handle it.
- Creating Stations, Steps and Processes: this article will guide you through the basic steps to create your first process.
2- Group of Steps: purpose and configuration
2.1 - Overview
Group of steps have several purposes and benefits:
- They allow Process Engineers to group steps according to the various assembly tasks to be carried out. Once a group of step has been created, it is possible to share it across several stations by simply drag and dropping in at the right position in your process.

- They allow several operators to perform up to 8 tightening simultaneously at a target station: it is the Concurrent Step Group Style Option.
- They allow the operator to select which set of instruction to work on. This is particularly useful when manufacturing large parts with a number of manufacturing steps that are not dependant on one another: it is the Task List Group Style Option.
2.2 - Creating and using group of steps
2.2.1 - Creating a group of steps
To create a group of steps:
- Navigate to CVIFusion Process Manager view then open an existing project or create a new one.
- Click on the Group panel once the project is open then click New Group.

- Set your group with an unique Name (Mandatory): while you are free to choose any name you wish, it is best to ensure the name reflects the Group of Steps purpose.
- Provide a description for the group (optional): it is best to provide details about the purpose of the created group of steps.
- Set the Group Style: this menu lets you choose how your Group of Steps will behave at the station. The various options will be explained further down in the article.
Click Save Group once your settings are complete: the created group will be displayed in the Steps & Groups pane.
Drag and drop the Group of Steps to the target station then populate it with process steps.
Once all the necessary steps have been added, click on Save Process Project.

Furthermore, when working with Group of Steps:
- Group of Steps can be either Unique or Common. However, as opposed to regular Steps, it is not possible to configure said state: it will be derived from the step type within the group.
As an example: if at least one step within the Group of Step is unique then the whole group status is set to Unique. On the contrary, if all steps within the group are set to Common, then the Group of Step is set to Common: the group can therefore be used several time across your line. - It is possible to use a Group of Steps within another Group of Steps. However, prior to release 8.6.1, it is not advised to use for nested groups either Concurrent group of steps or Task Lists.
With V8.6.1, this limitation has been removed and you can now freely use any group style as a nested group of steps.
Limits:
- Pivotware prevents you from having more than 3 nested groups.
- It is not possible to directly associate Variants to a Group. However, each step within the group can be associated as usual to a variant. The result during operation is that any step within a group will be filtered according to the selected variant.
2.2.2 - Group Style
Note: the process for the examples used below is attached to the article for you to use as a reference.
There are 3 different Group Styles.
2.2.2.1 - Sequential Group style
All steps listed in the Group setup with this particular style will be performed sequentially.
Consider the example below:
After deploying to the station, all steps within Groups - Sequential Steps Example will be performed sequentially one after another:
- First the Tightening Step 2.1 will be performed.

- Tightening Step 2.2 will be performed next once all the tightening operations from the previous step are complete, or the operation has been skipped.

- Last, Confirmation - Generic step is launched once the second set of tightening is complete.

The primary purpose of this group style, even more than the other, is to organise logically your operations so that they best reflect the manufacturing sequence. It also allows for advanced use of Pivotware to drive the process - typically using File Function steps to drive operations.
2.2.2.2 - Concurrent Step
Any step in the group that is not an Action Tool will be ignored at run time.
Consider the example below: 


Tightening steps 3.1 and 3.2, though, will be displayed side by side during operations, and both tools will be enabled for tightening (if they are effectively connected to the station).
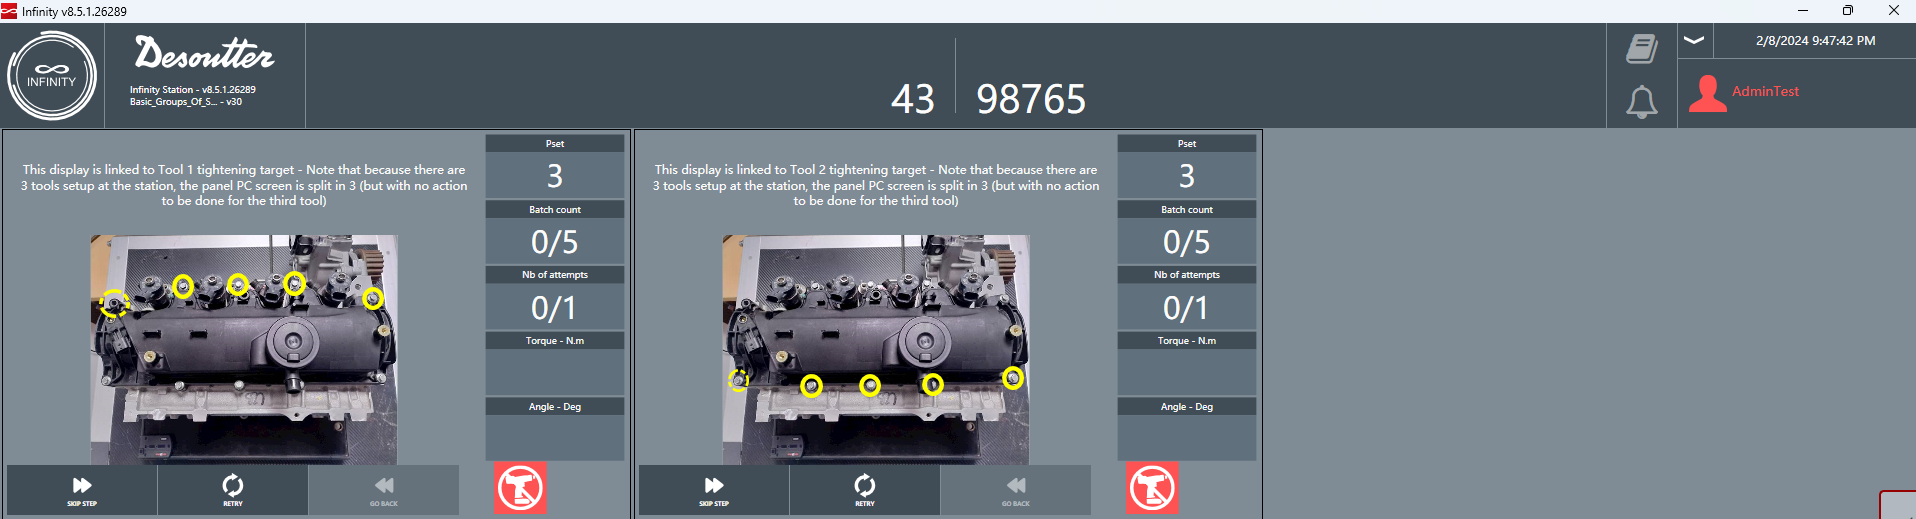
2.2.2.3 - Task List
The operator will be able to manually select at run time the order in which to run the manufacturing operations listed in the group. Operations within the group will be considered complete once all actions have been performed.
Consider the example below:

There are two level 1 Task List group.
During the process, the operator will be free to choose which assembly action to run and the order to run them in.
 The operator can first choose, for example, to run the Confirmation - Paint quality step: as a result, he will see displayed the particulars of said step.
 Once the step has been performed, the operator is brought back to the selection page where he can select the next manufacturing sequence within the group.
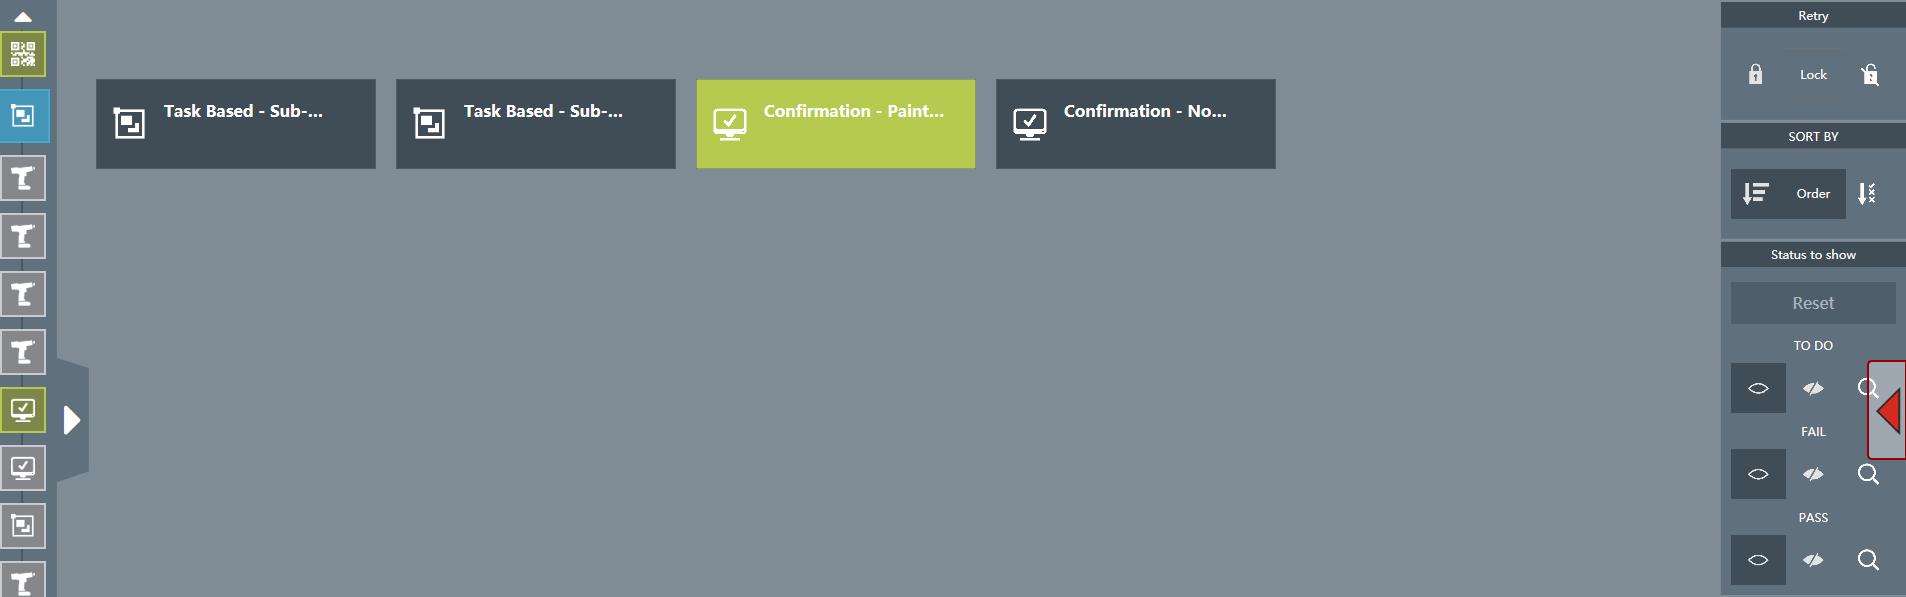
Upon completion of all the manufacturing steps within the group, the process moves to the next Task List in the assembly process.

Steps that failed within a Task List group can not, by default, be performed again. However, it is possible to change the default setting in CVIFusion to allow an operator or an user with extended privileges to retry any failed step within a group.
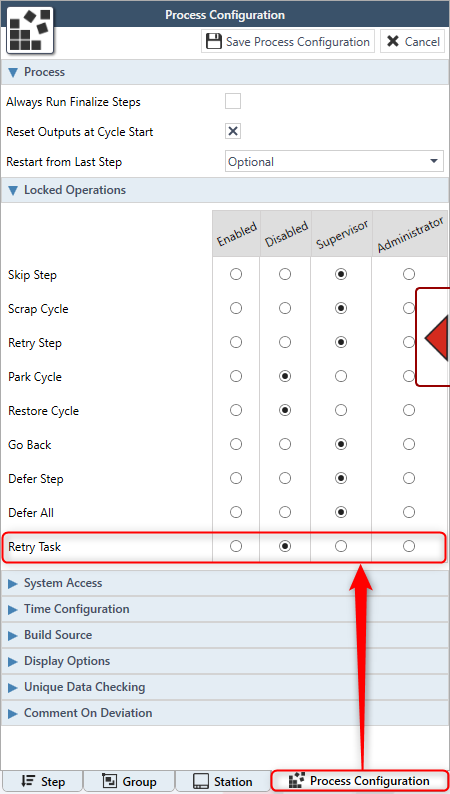
- Open the project in CVIFusion then open the Process Configuration pane for the target station.
- Expand the Locked Operations view then enable the Retry Task for the target operator profile and click Save Process Configuration.
- Open the Step pane then select the target group.
- Expand the Locked Operations menu then enable the Retry Task for the appropriate user profile.

- Save then deploy the process to the target station.
Upon failing a step, an operator with the right privileges can allow for failed operations to be run again by clicking the Lock button: all failed Groups can be run anew.
Limitation: it is not possible to use the following steps to jump in and out of a task based group:
- Jump step.
- Logic Decistion step.